
- Disk partitioning is one of the many steps you must take when preparing a system for use.
- Partitioning means to divides a single hard drive into many logical drives.
- In each system the physical disk drives are divided up logically into partitions that allow you to store data on them.
- There are also special types of partitions such as RAID that allow for increased performance, redundancy or both. LVM, like RAID is an advanced form of partitioning that eases management of partitions and makes growing them for increased storage capacity simple.
- One of the key point to remember when working with partitions is to always plan ahead.
Disk Partitioning Criteria:
- MBR – Master Boot Record.
- P – Primary Partition
- Extended – Extended Partition
- L – Logical Partition
- Free – Free Space
- Every disk can have only 3 primary partitions.
- Primary partition is a partition which usually holds the operation system.
- Extended partition is a special type of primary partition which can be sub divided into multiple logical partitions.
- Logical partitions are the partitions which are created under extended partitions.
- As in the real word, it is the result that matter. It doesn’t matter whether you use Disk Druid, fdisk or parted to create partitions. You can create new partitions at the command line or use GUI front these tools such as the Disk utility.
- Remember Disk Druid is available only during the installation process.
- You can use two different utilities when partitioning disk.
fdisk -> Disk partitioning utility
parted -> Another Disk partitioning utility - While fdisk is more common, it is slowly being replaced by parted, which is more flexible
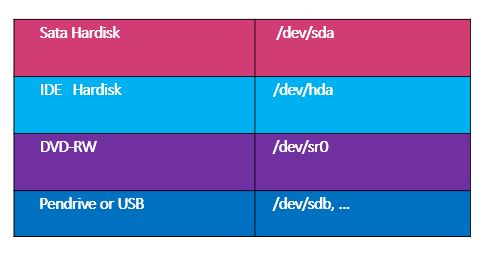
Disk Identification:
Different type of disks will be having different initials in linux.
- IDE drive will be shown as /dev/hda
- SCSI/SATA drive will be shown as /dev/sda
- virtual drive will be shown as /dev/vda
Note: The first two letters represent whether the dis is a SCSI sd) or IDE(hd) disk. The third letter represents which disk it actually is. If there is a number after the three letters, it is the number of the partition.
- To view information about the current partition layout,
#cat /proc/partitions | grep hd
#cat /proc/partitions | grep sd
- You need to view their current partitions to see if any exist.
Syntax:
fdisk [options] [device]
Options:
-b Specifies the sector the size of the disk.
-h Number of heads on the disk.
-l Lists current partition table.
Note: There are some limitations when it comes to working with partitions. You can have only four partitions to a physical disk with one exception. If you want to make more than the four, you need to create three primary partitions and one extended partition, although the primary partition can then hold 11 logical partitions (5-16) on it.
Creating a Partition
Syntax:
#fdisk /dev/sda
View all the options available to you
Command (m for help) :m
p    Print the partition table
n    Add a new partition
d    Delete a partition
m   Print this menu
q    Quit without saving changes
t    Change a partitions system id
w    Write table to disk and exit
Create a new partition:
#fdisk /dev/sda
:n
First cylinder(1-1044, default :)  :
using default value 1
Last cylinder or   +size ........ (1-1044, ........) : +500M
create a second partition
: n
Verify newly created partitions
: p
Write the changes to disk
: w
Now that two new partitions have been created and written to disk, you should verify their existence. Before doing that, however, you want the kernel to reread the partition table to make sure that it recognizes all disks and partitions correctly. to do this, you use the partprobe command.
Syntax:
partprobe [options] [Device]
-d Does not actually inform the operating system.
-s Prints a summary of contents.
- Now call the partprobe command.
#partprobe /dev/sda
- Now that you have created partitions with the fdisk utility, do it again using the parted command.
- Create a partition:
#parted /dev/sda
- Menu
(parted) help
- Create your first partition in a similar manner to fdisk:
(parted) mkpart
partition type ?  primary/extended/logical ?
File System type ? [extq] ?
start ?
end ?
- Make your second partition again
- Before writing changes to disk, you should verify that they have been created the way you want them:
(parted) print
- Exit the program to save your changes
(parted) quit
- There are a few things you should notice here. First, you need to specify exactly where you want the start and end of the partition to be. If you don’t plan this out ahead of time, you will end up with incorrect partition sizes. You should also take note of the fact that you don’t have to write the changes to disk manually, this is done for you when quit the parted program.
- Again, you need to force the kernel to reread the partition table
#partprobe
Once again, verify that your partitions have been created successfully:
#parted -l
Deleting a Partition
Deleting a partition is must easier than creating one because you need to specify only partition number that you want to delete.
Start the fdisk utility:
#fdisk /dev/sda
: p   printout the current partition
: d   Delete a partition
: 6   Want to delete 6th partition
: w   Write changes to disk
- Don’t forget to reread the partition table:
#partprobe /dev/sda
Start the parted utility:
#parted /dev/sda
(parted)   print
(parted)   rm5
(parted)   quit